Dress Up Your Letters With Joya Rose Of Joya Rose Illustrations

We are always looking for fun ways to dress a letter, so we asked hand-lettering & illustration master Joya Rose for a few of her favorite ways. Find out how to personalize your letters for #write_on with these pro (and wallet friendly) tips! And p.s. check out Joya's #write_on journey on Instagram: @joyarose. -Hello!Lucky & Eggpress

Getting mail is SO FUN. But so is sending it! For me, sending someone a note by snail mail has the same kind of joy in it as wrapping up a gift - and these days, it’s just as special! The excitement and joy the month of April will bring to the lucky recipients of letters & cards sent by #write_on ambassadors is surely immeasurable - but I say, let’s kick it up a notch and make the OUTSIDE of your mail just as fun as the inside! My favorite go-to ways for doing this are: 

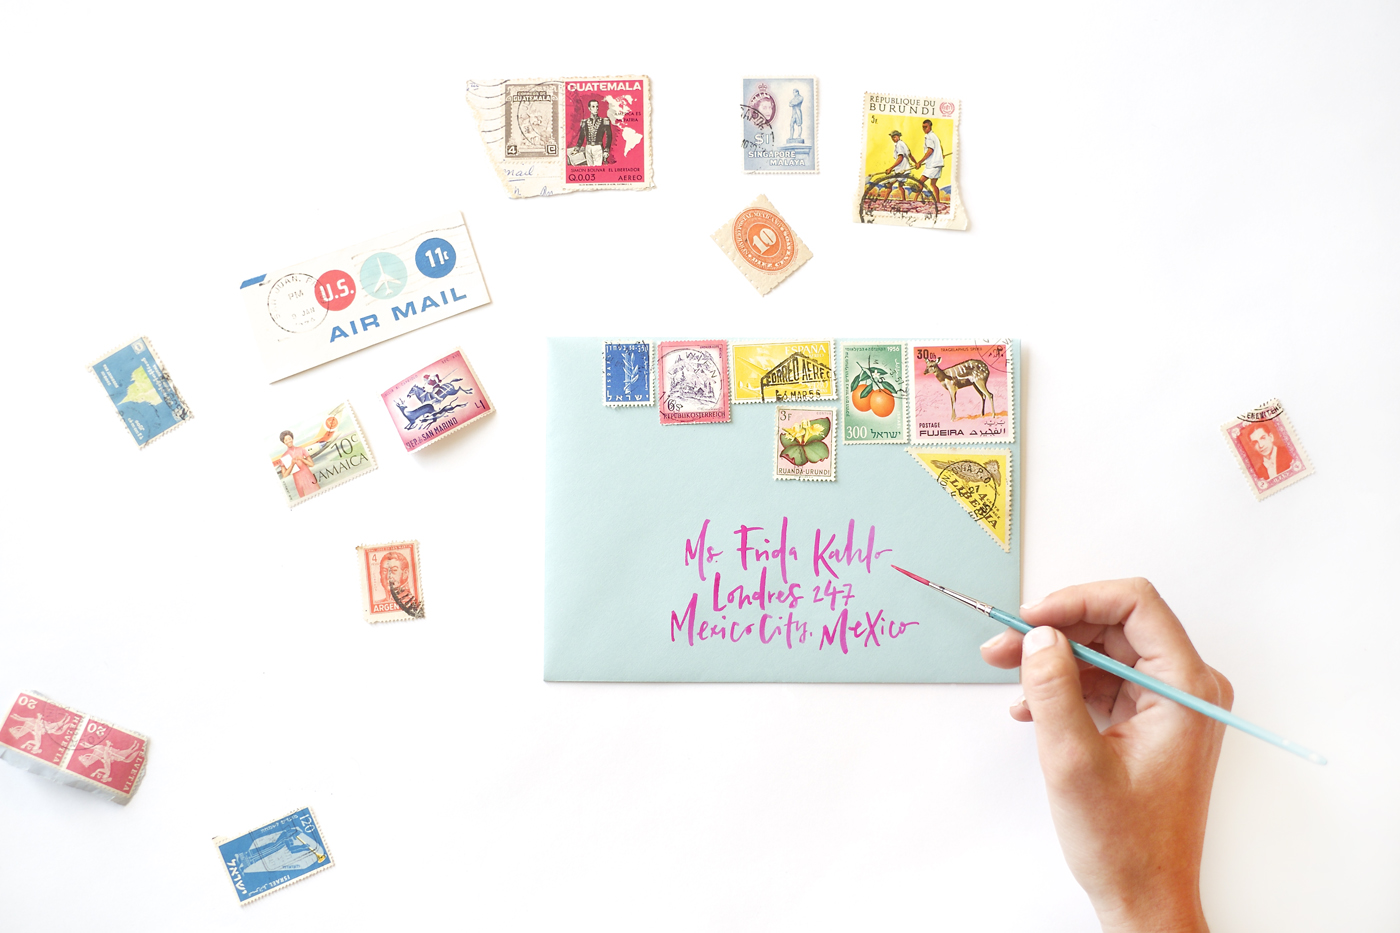
  • Adding colorful, vintage stamps

  • Using big, bold lettering styles

  • Adding stickers to the envelope

  • Making an envelope from patterned paper

As far as tools & materials - you can pretty much use anything you have lying around the house! An old magazine, a ball point pen, and some scotch tape will do you just fine. Some of my favorite tools - with the chew-marks to prove it! - are described below.

Materials.jpg

Silk ribbon: I love adding texture to mailed pieces (on the inside, of course) - which can be twine, dried flowers, feathers, ribbon, or anything you like. This ribbon is from Silk & Willow.

Gouache: gouache is basically an opaque watercolor, which lends itself very well to painting color on color, or white on color, as it won’t fade into the paper as much as watercolors will. This one is Winsor & Newton.

Brush pen: the color brush by Pentel is one of my favorite tools; it acts like a paint brush but is entirely self-contained, and never needs to be dipped in ink.

Chalk pen: this pen is great for getting nice clear whites on colored or black papers - from Chalk Ink.

Washi tape: obviously this stuff is amazing and has unlimited uses - I’m a traditional metallic-gold kind of girl - this one from one of my FAVORITE art suppliers, Uguisu.

VINTAGE STAMPS

If you like color, paper, art, history, or all of the above, you love stamps (you just might not know it yet). I have the incredibly good fortune to live right next to a good friend and avid stamp collector. It is so much fun to pour over these tiny little art pieces - in this case, sorted by country - and get a history lesson in the process. To get your hands on some of these beauties, you can do what my friend does and buy them from former collectors at estate sales (may they rest in peace in stamp heaven), go to your local stamp store (a real thing!), or you can shop for more specific color schemes or categories on eBay and etsy. Unused stamps never lose their value in their country of origin, so you can use a hodge-podge of real stamps to make up the necessary postage! 

For this particular envelope I went for bright pops of color & tropical illustrations, including stamps from Israel, Jamaica, Austria, and a particularly special triangular number from Liberia. 

Vintage Stamps_All Done.jpg

LETTERING

The thing I love most about lettering is how expressive it can be. Everyone has a unique hand, and the way we write words reflects how we feel at that moment; like capitalizing something we REALLY want to emphasize. Using highly contrasting styles and sizes can be a quick and easy way to bring an extra element of drama to an envelope. The sky’s the limit here, so I went for the basics: simple shapes and neutral colors to create a clean, whimsical effect.

Regina Felange - 2.jpg

TIP: To create a look similar to that of a calligraphy pen, simply thicken the down-strokes of your letters (any time your pen is moving from top to bottom), like I am doing to the “L” below. It will add instant depth and character to your letters. 

STICKERS

There exists a vast and unknowable universe of sticky paper-accessories at stores like Michaels and Paper Source. Enter at your own risk - you may never come out! I went for simple banner stickers, which make for a clean, elegant way to dress up a very simple envelope.

Stickers_All Done.jpg

MAKE YOUR OWN ENVELOPES

What is an envelope? Paper, folded and glued so that other papers can’t get out. Making your own envelopes can be a very fun and inexpensive way to spice up your mail - and opens up UNLIMITED possibilities for envelope sizes, shapes, patterns, & colors. 

DIY Envelope - gluing.jpg

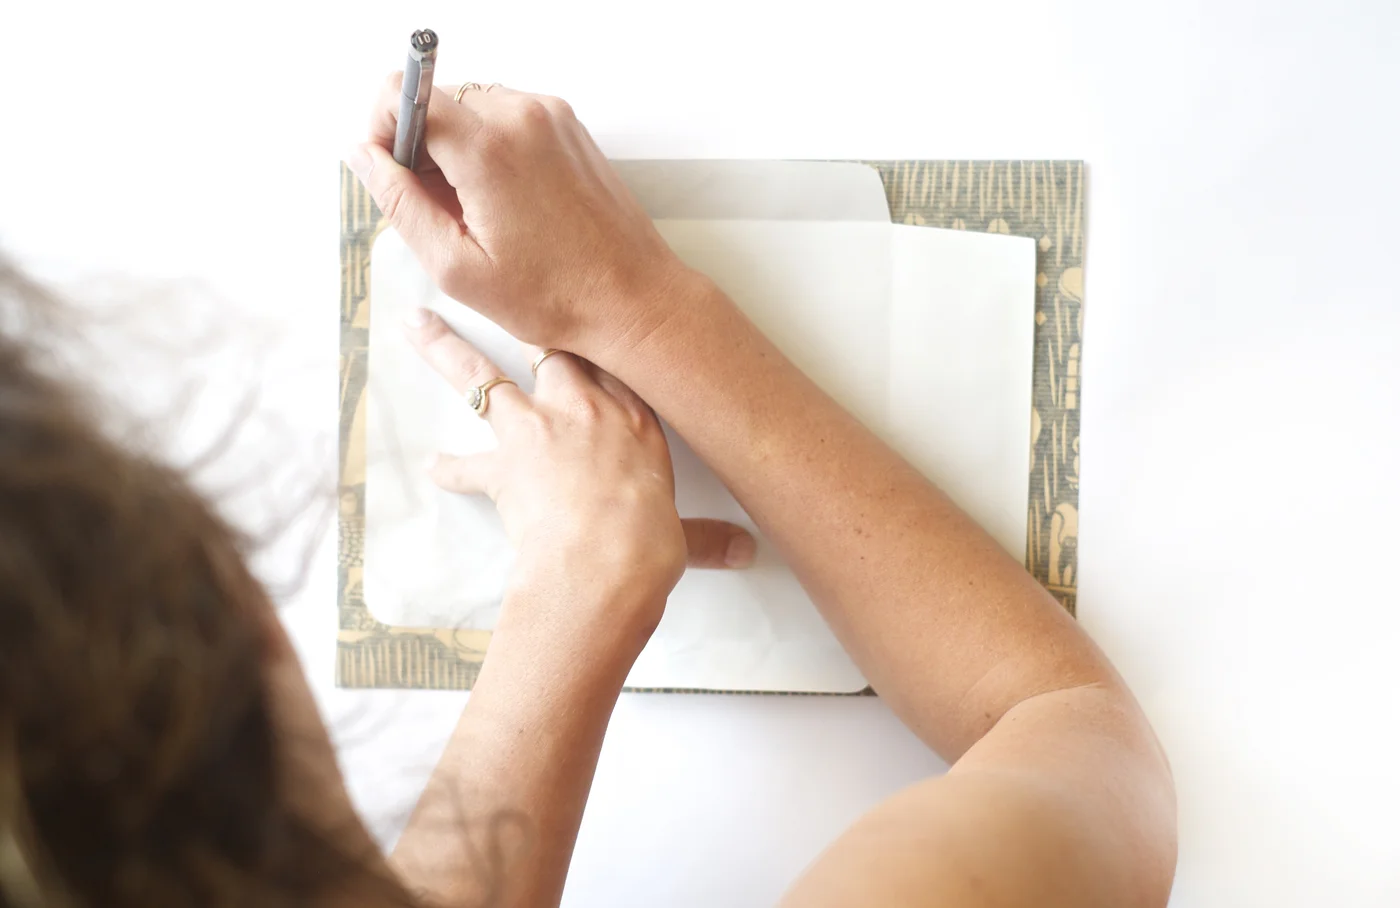
Instead of buying an envelope template, make your own! Your envelope can be any size you want, and can open anywhere you choose. To start out, deconstruct an envelope you already have, and trace out the shape on the paper you’ll be using for your home-made envelope (note: if you’re planning on making lots and lots of envelopes, make a template by cutting out the shape in a thick card stock or cardboard). Then once you’re comfortable with the general construction, you can start creating your own designs (square, circular, heart-shaped - sky’s the limit). 

Envelope Trace.jpg

For this one I used waxed Japanese wrapping paper (from Uguisu). Since it worked best for my pattern, I chose a vertical orientation, which meant that instead of the shorter flaps being on the inside, they were on the outside. Any kind of glue will work for the project - elmer’s, glue sticks - even double-stick tape!

Envelope + Card.jpg

Since ink disappears on a bold pattern like this, I had to add a label to the front of my envelope to write the address on. Taking my cue from the paper pattern, I made a fun circular label painted with gouache. Sticky rectangular labels (like these) also work great for this. 

Now all there is left to do is get writing! You can follow my #write_on journey on Instagram at @joyarose - I look forward to seeing your creations! 

5 Tips for Writing a Thank You with Sarah Schwartz of Stationery Trends Magazine

SARAH SCHWARTZ IS EDITOR IN CHIEF OF STATIONERY TRENDS MAGAZINE AND HAS HER OWN BLOG THE PAPER CHRONICLES WHERE SHE HOSTS AN ONGOING LETTER WRITING CAMPAIGN. NEEDLESS TO SAY, SHE KNOWS A THING OR TWO ABOUT WRITING LETTERS AND WE'RE THRILLED THAT SHE'S SHARED SOME TIPS ON WRITING THANK-YOUS WITH US! THERE'S SOMETHING FOR EVERYONE HERE, WHETHER YOU'RE LOOKING TO UP YOUR GAME OR NEVER REALLY DEVELOPED A THANK YOU WRITING HABIT IN THE FIRST PLACE. THANK YOU SARAH FOR YOUR THOUGHTFUL AND INSPIRING ADVICE!


The Power of the Unexpected

Those of you who know anything about me know that I am devoted to keeping the art of letter-writing, card-using and invitation-sending alive. In fact, that’s the mission of my blog, ThePaperChronicles.com. So when write_on asked me to pen a post on Five Tips for Writing a Thank You Note, I thought it would be a snap.

I figured I would break down penning a great thank-you into three simple steps/sentences. First, thank the recipient for whatever it is he or she did. Then describe how much you’ll enjoy using it or what benefit it has brought you. Finally, close with a mention of when you’ll see them (or hope to see them) again.

But then I actually sat down to write all this — and realized pretty quickly that that post just wouldn’t cut it. First, anyone who writes notes on any sort of regular basis already knows this — and even if you didn’t, you do now. Second, although it does get the job done, that traditional thank-you template is rigid and maybe even restricting. Finally, that’s exactly the kind of post you would expect to read about thank-yous, so I’ll take a pass on writing it. So put all that aside for now and focus instead on this: The best correspondence has an element of the unexpected— which brings me to my first talking point:


1. Embrace the Unexpected.

Forget all about the proper thank-yous you’ve had to write, or Aunt Jean would call your Mom and complain. Instead, think of those who bring joy to your life and expect nothing in return — or are even unaware how their actions positively impact you. These are the people who really deserve a thank-you! And there are few things that are so pleasing as being thanked for something you’ve done and most likely forgotten all about.  

2. Be Authentic.

Don’t hold back or cling to etiquette too much. The problem here is that this can lead to writing something that’s completely proper, but also stiff, formal and stale, as if your fifth grade teacher were going to grade it later. Instead, take a moment and think about what the deed/act/person brings into your life. How has it changed you for the better or brightened your day? But above all, be honest with yourself and the person you are writing to. Remember — you want to knock their socks off. Don’t hold back!

3. Get the Words Right.

Writing a draft is not absolutely necessary, but it does help put your thoughts in order and translate them from emotion to prose — and I suspect the most compelling letters are written this way. Your goal is to have your correspondence reflect the true you — your personality, likes, quirks, humor, etc. — even as you hold a mirror up to the recipient.

4. Be Proud of Your Handwriting.

Just as your words should reflect your very essence, so should your handwriting. I do not have the best penmanship — in fact it’s rather deplorable —  but I try to not be ashamed of it and let it exist in its true form (well, its most readable form) in my own correspondence.

In writing this post, I looked through a lot of thank-yous that I saved, and one of the things that struck me about my favorites is that the personality of each writer comes through just in the way the words travel across the page. It is as much a part of your special missive as is the stationery you use and the stamps you select.

5. Be Succinct.

Don’t feel pressured to make your card a certain length — rather get in, say what you want to say, and get out! Don’t feel you need to write a novel delineating your gratefulness — even a few sentences will do, if the sentiments they contain are genuine.

So there you have it, folks — think of these as my version of Damone’s Five Point Plan from Fast Times at Ridgemont High. Instead of getting the girl though, these will get your gratitude and true feelings across. In written form, a vital part of you will live on forever.
 

 This Oblation Papers & Press note I received from Stationery Trends Editorial Board Member Chandra Greer of GREER Chicago is short in length — but gargantuan in encouragement. It arrived while we were in the midst of an exciting yet exhausting …


This Oblation Papers & Press note I received from Stationery Trends Editorial Board Member Chandra Greer of GREER Chicago is short in length — but gargantuan in encouragement. It arrived while we were in the midst of an exciting yet exhausting redesign — and gave me the energy needed to see the process through.

 All I have to do is look at the elegantly sloping handwriting of Bonnie Marcus— in hot pink, no less, penned on her own stationery — and her glamorous, sweet personality comes right through!


All I have to do is look at the elegantly sloping handwriting of Bonnie Marcus— in hot pink, no less, penned on her own stationery — and her glamorous, sweet personality comes right through!

 To me, reading this note that NSS Show Manager Patti Stracher sent me following my ’14 seminar feels almost like an actual conversation with her (and is the equivalent of a hug sent via the USPS).


To me, reading this note that NSS Show Manager Patti Stracher sent me following my ’14 seminar feels almost like an actual conversation with her (and is the equivalent of a hug sent via the USPS).

 Lauren Boggs Meslar of beve! tucked this incredibly touching note into a box of goodies she very kindly sent for my daughter’s birthday party last summer. While beve’s washi tape is tops, to me this sheet of graph paper is the most precious thing i…


Lauren Boggs Meslar of beve! tucked this incredibly touching note into a box of goodies she very kindly sent for my daughter’s birthday party last summer. While beve’s washi tape is tops, to me this sheet of graph paper is the most precious thing in the box — and something I’ll probably cherish forever.

 Here’s a doozy of an unexpected note — from my senator, Sherrod Brown, in response to a rather strongly worded pro-choice letter I wrote into our local paper here. Whenever I doubt myself in any arena of my life, I often think of his words, “Keep s…


Here’s a doozy of an unexpected note — from my senator, Sherrod Brown, in response to a rather strongly worded pro-choice letter I wrote into our local paper here. Whenever I doubt myself in any arena of my life, I often think of his words, “Keep speaking out — your comments matter.”

Snail Mail Inspiration

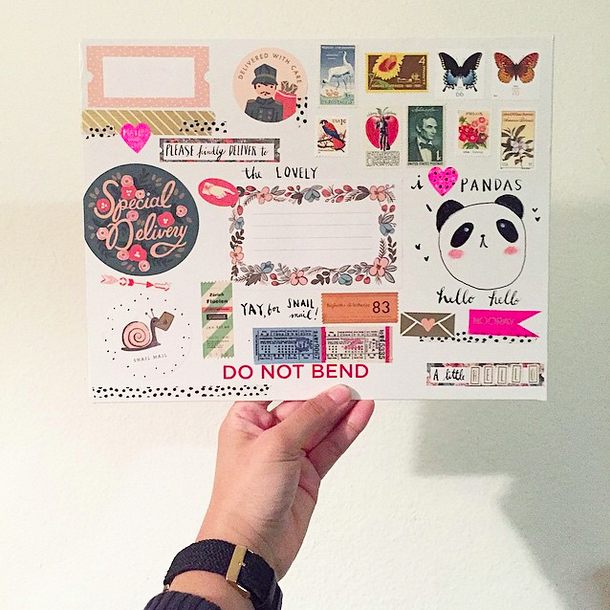
We are so inspired by all the 🐌 mail people have been sharing with #write_on! We stumbled upon these International packages & letters delightfully decorated by @craftmakesmile and had to share. These letters are so special even before the contents are revealed! We'd love to see your favorite way to send mail! Share your snail mail with #write_on!

Stay tuned for DIY's, tips, and more inspiration here on the blog!

All photos by @craftmakesmile.

5 Tips on Letter Writing with your Toddler from Andrea Mclaren

One of the funnest parts of Write_On last year was people sharing their letter writing experiences with us. Andrea McLaren is one such new friend who wrote to tell us how much fun she'd had writing letters with her daughter Willa. Andrea has so kindly contributed 5 inspiring tips for those of us wanting to write letters with young people. You can follow Andrea and Willa's adventures for Write_On 2015 on Instagram!

My daughter Willa and I really enjoyed the #write_on campaign last year. Over the month of April 2014 we sent 35 pieces of mail – some of our mail flew as far as Germany, and some of it landed as nearby as our own neighbors here in our apartment building. We sent stickers to little friends we have not yet met, and thank-you cards to Willa’s grandma and nana. We sent paintings of donuts and watercolor handprints and lots and lots of photos.

Last year Willa was three years old when we started #write_on. It was a great catalyst to educate her about the mail process while opening her eyes to the endless potential joy of sending and receiving good old fashioned mail. I had a pen pal during my teenaged years, and have always really loved sending and receiving mail so I knew it was something I wanted to share with Willa. We can’t wait to get started with #write_on this year. Here are a few tips for enjoying the postal service with your child.

1.      Start by sending your child some mail.

It could be as simple as a card with a few stickers. Print their name large and clear on the envelope, so when they receive their mail, he/she can recognize their own name. Willa loved this! She was just learning to recognize the letter W around that time, and it was a massive thrill for her to see that there was a letter with her name on it that she could open and devour on her own. She has loved it ever since. Every time we check our mailbox: “Mom, is there anything for me?!”


2.      Keep an eye out for mail-related items and visuals throughout your day and point them out to your child.

You will be blown away by how quickly you will begin to recognize every post office, mail box, mail truck and letter carrier in your neighbourhood. Here in Canada, we have bright red mail collection boxes, and Willa quickly began to enjoy spotting them with a “MOM! MAIL BOX!!”


3.      Read about mail and letter writing.

We happened upon a few mail-themed books during thrift shopping and browsing at the bookstore that really helped Willa understand the basics of the postal service. Our favourite, still today, is found in Richard Scarry’s “What Do People Do All Day?” and it is titled, simply “Mailing a Letter”. We also love the classic story of “The Seven Little Postmen”.


4.      Ask your child how they would like to contribute.

When Willa was three, she loved to decorate the outside of the envelopes with stickers and drawings and scribbles. A good tip is to let the child go nuts all over the envelope, and then affix the address, return address and postage afterward using white labels over top of the artwork, to ensure that the addresses are legible.


5.      Make sure to send mail to someone nearby so that your child can go visit and see evidence of his/her mail at the recipients’ home. 

When Willa saw the photos and card that she had sent her grandma on the fridge at Grandma’s house, it helped her to complete the circle of mail delivery. It was also really cool for her to see the envelope that she had decorated after it had been stamped and processed through the mail system.


I hope that these tips help you and yours enjoy #write_on2015! We will be sharing more about our experience throughout the month of April on my Instagram (@andrea.mclaren) so feel free to take a peek or send us your mailing address so we can send something your way.